
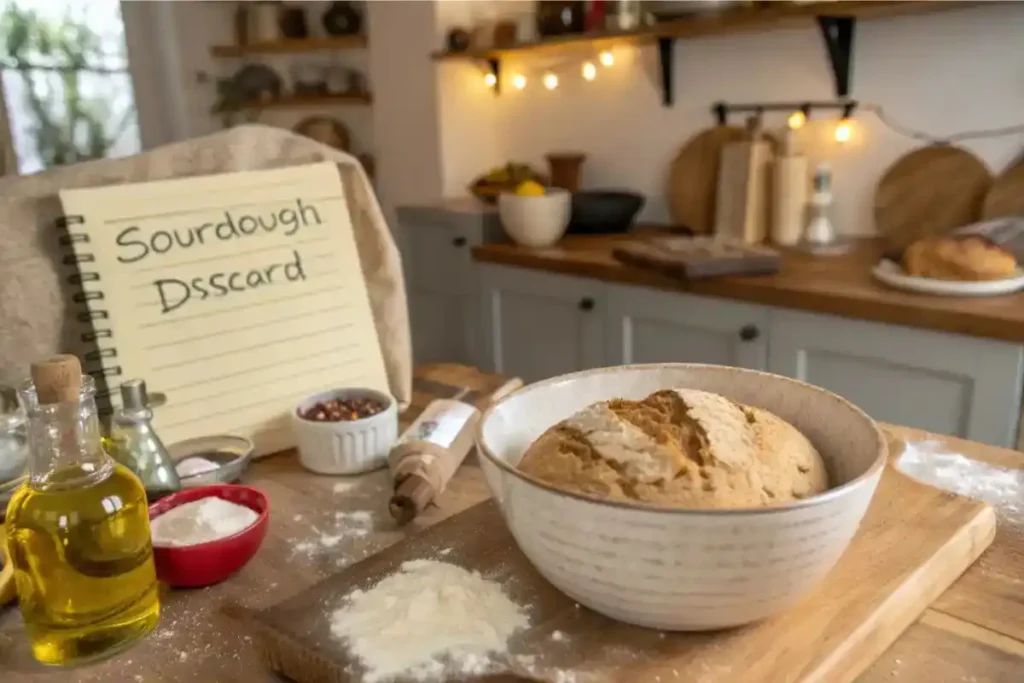
If you’re into sourdough baking, you’ve probably ended up with sourdough discard and wondered what to do with it. Don’t throw it away! That leftover starter — known as sourdough discard — is full of flavor and can be used in all kinds of tasty recipes. One of the easiest and most delicious things you can make with it? Sourdough discard focaccia. This fluffy, golden bread is crispy on the outside, soft on the inside, and packed with flavor. Best of all, it’s simple to make at home. Let’s walk through it step-by-step.
What Is Sourdough Discard?
Sourdough discard is the extra starter you remove when feeding your sourdough. It’s not “bad” — it’s just unfed and needs to be used or stored. Many people toss it out, but that’s a waste! It can still be used in recipes like pancakes, crackers, and bread. Using it in focaccia is a great way to add a light tangy flavor and make the most of your starter.
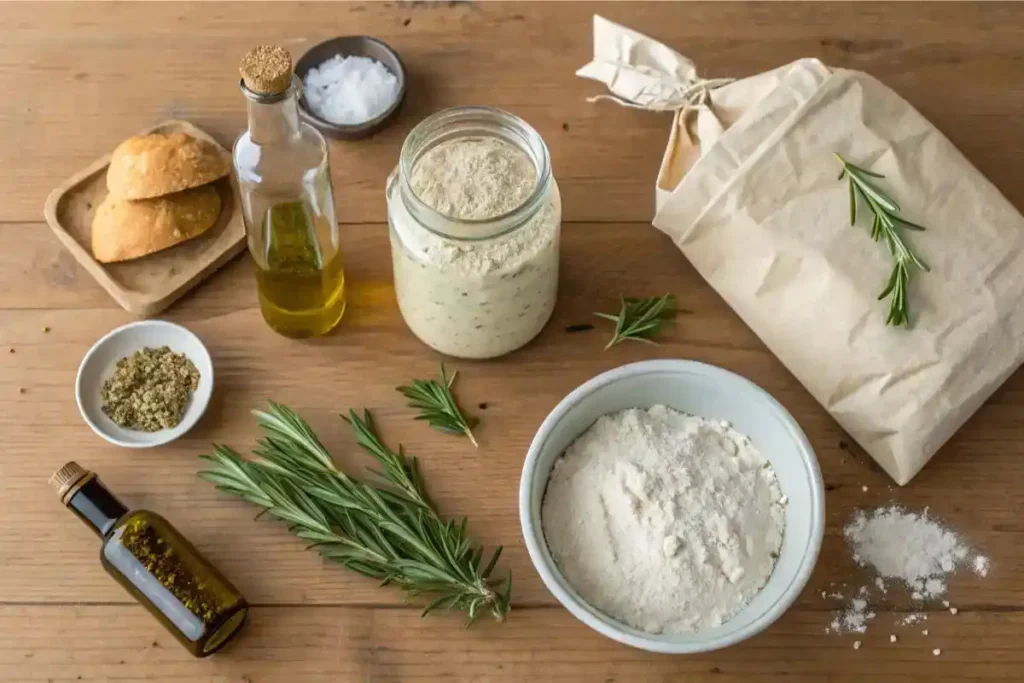
Ingredients You’ll Need
This recipe uses simple ingredients you probably already have:
- 1 cup sourdough discard (from the fridge is fine)
- 2 cups all-purpose or bread flour
- ¾ cup warm water
- 1 teaspoon salt
- 1 tablespoon olive oil (plus more for topping and greasing)
- Optional toppings: rosemary, garlic, flaky salt, cherry tomatoes, olives
Tip: Feel free to get creative with your toppings!
Step by step guide
- Step 1: Mix the Dough
In a large bowl, mix the sourdough discard, flour, water, and salt. Stir it all together until it forms a sticky dough. Add the olive oil and mix again. The dough will be wet and sticky — that’s perfect for this recipe. You don’t need to knead it, so it’s great for beginners!
Cover the bowl with a clean towel or plastic wrap and let it rest at room temperature for about 3–4 hours. The dough should double in size. If you have more time, you can let it rest in the fridge overnight for better flavor. - Step 2: Prepare the Pan
Generously oil a 9×13-inch baking dish or sheet pan. This helps the bread not stick and gives it a crispy crust. Gently move the dough into the pan. Use your fingers to press it out toward the edges. If it’s hard to stretch, let it sit for 15 minutes, then try again.
Cover the dough loosely and let it rest for 30–60 minutes until it puffs up a bit more. - Step 3: Add Toppings and Bake
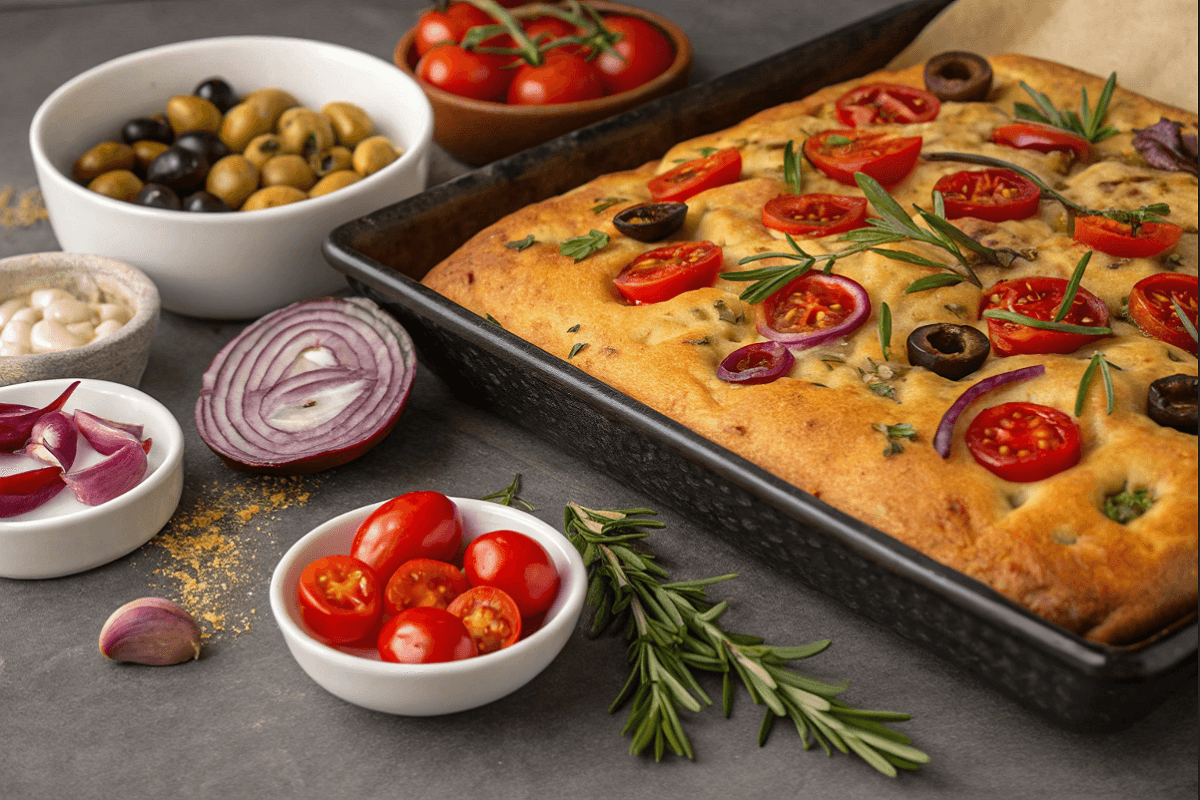
Preheat your oven to 425°F (220°C).
Now the fun part — use your fingers to press dimples all over the dough. Drizzle olive oil over the top and add your toppings. Classic choices like rosemary and flaky salt work great, but you can also use garlic, sliced onions, or cherry tomatoes.
Place the pan in the oven and bake for 20–25 minutes, until the top is golden brown and crispy. The smell will be amazing! Let it cool slightly, then slice and enjoy.
Tips for the Best Focaccia
- Don’t skip the olive oil — it gives the bread its signature crispy edges.
- Want more air bubbles? Try folding the dough once or twice during the first rise.
- Store leftovers in an airtight container. Reheat in the oven or toaster for the best texture.
- You can freeze leftover slices — just wrap them well!
Common Questions
Yes, but the bread might rise faster. Discard is easier for this recipe and gives great flavor.
Up to a week, as long as it smells okay and isn’t moldy.
Yes, but use a gluten-free flour blend, and keep in mind the texture will be different.
Final Thoughts
Making sourdough discard focaccia is a fun, easy way to use up your discard and bake something amazing. You don’t need special skills or equipment — just a few ingredients and some time. The result? A golden, fluffy, crispy bread that’s perfect for sharing (or keeping all to yourself). Next time you feed your sourdough starter, save that discard and make this focaccia. You’ll love it! Happy baking!
More
Looking to explore more delicious ways to use sourdough discard or elevate your baking skills? Check out QuicklyTaste’s own guide on Sourdough Discard Focaccia for step-by-step instructions and creative topping ideas. For another tasty twist on sourdough, their recipe for Sourdough French Toast is a perfect way to make breakfast extra special using leftover starter. If you’re into savory baking, consider trying their Ricotta Cheese Pizza for a unique, cheesy creation. For additional inspiration, you can explore external resources like The Perfect Loaf or King Arthur Baking’s discard recipes to find more creative and easy ways to use up sourdough discard. These links provide trusted tips and recipes that help you bake confidently while minimizing food waste and making the most of every batch.
Sourdough Discard Focaccia
Equipment
- Large mixing bowl
- 9×13-inch baking dish or sheet pan
- Spatula or spoon
Ingredients
Focaccia Dough
- 1 cup sourdough discard unfed is fine
- 2 cups all-purpose or bread flour
- 0.75 cup warm water
- 1 tsp salt
- 1 tbsp olive oil plus more for topping and greasing
Optional Toppings
- rosemary
- garlic sliced or minced
- flaky salt
- cherry tomatoes or olives
Instructions
- In a large bowl, mix sourdough discard, flour, water, salt, and olive oil until sticky dough forms. No kneading needed.
- Cover and let rest at room temperature for 3–4 hours or refrigerate overnight for more flavor.
- Oil a 9×13-inch pan. Transfer dough to pan and gently stretch it to fill. Let it rest covered for 30–60 minutes until puffy.
- Preheat oven to 425°F (220°C). Dimple dough with fingers, drizzle with olive oil, and add desired toppings.
- Bake for 20–25 minutes until golden and crisp. Let cool slightly before slicing.